Once you’ve Used the ‘Split’ polygon tool to obtain the orientation of a polygon’s normals, you can move onto “Camera Mapping”, which sometimes eliminates the need to unwrap UVs. With this, you can use a camera to project a texture onto a piece of geometry. This is a tool I use quite a lot.
Once you’re happy with the results, you can ‘Generate UVW coordinates’, which basically sticks the projected texture onto the object and creates a new UVW tag for it.

Something to note here is that you can use the new UVW tag in conjunction with the previous UVW tag. A material tag will use the UVW tag placed to the right of it in the tag hierarchy, so bare that in mind when applying multiple materials.
There isn’t a limit to the amount of UVW tags you can use either (as far as I’m aware), so feel free to project textures and generate UVW coordinates for them as many times as you like.

In conjunction with material alphas, this can be used to quickly project various details onto an object (dents, scratches, paint marks, etc) whilst retaining the original UVW tag and textures.

A few Tips and Tricks:
Selection Tags: use these to limit where the textures are being projected, so the projection doesn’t spill onto other parts of the model.
Camera Lens: the focal length of the texture-projecting camera can distort the texture on curved surfaces; the higher the focal length, the lower the distortion.
Orthographic Views: top/bottom/front/back/left/right views can be used to prevent distortion from the camera lens, although it means you’ll need to use the ‘Zoom’ to adjust the texture scale.

Camera position: generally speaking, you should aim to have the camera in line with the normals of the surface you’re projecting onto. I usually do this by splitting the polygon from the surface I intend to project onto, and then use the split polygon to position and orient the projection camera (see the previous article on the ‘Split’ polygon tool).
Flat Surfaces: it’s better to project onto a flat surface and then deform it after the texture’s stuck on, rather than to try and project onto a curved surface. Otherwise, you may need to unwrap UVs (sorry).

Here’s a quick demo:
#1 Create a camera, and face it towards the surface you want to project textures onto
#2 Select the polygon(s) from the surface and apply the desired texture. In this case, I used a plain black material with a crack texture in the alpha. Feel free to turn off ’tile’ in the material tag if you don’t want the texture to repeat over the surface.
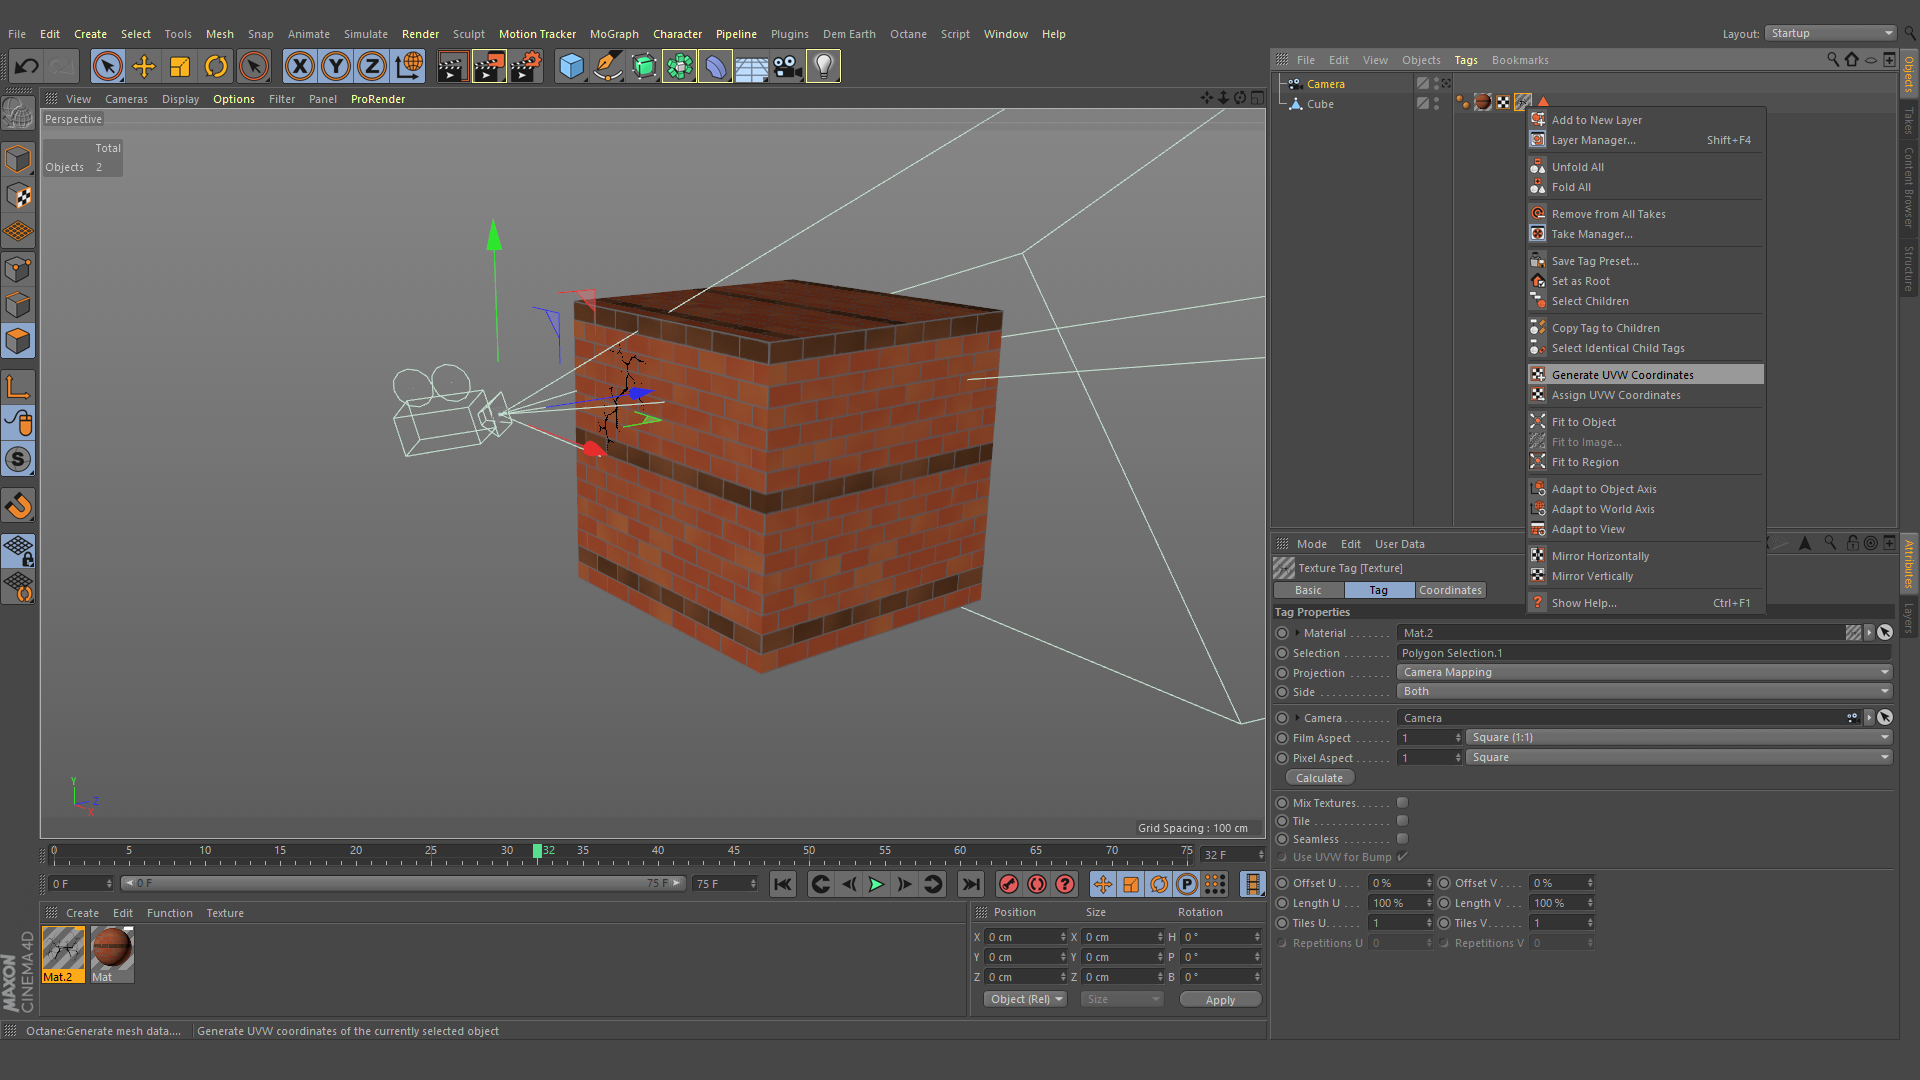
#3 In the material tag, change the projection to ‘Camera Mapping’, drop the camera into the ‘Camera’ field, and click ‘Calculate’. This should cause the texture to be projected from the camera, whilst retaining the texture’s aspect ratio.
#4 Adjust the camera to reposition/scale the texture as desired. Avoid rotating the camera away from the surface you’re projecting onto.
#5 Once you’re happy with the placement of the texture, and want to stick it on the surface, right-click the material tag and ‘Generate UVW Coordinates’. This should create a new UVW tag and change the material projection back to ‘UVW’. There’s no need for the camera at this point, so feel free to delete it.