
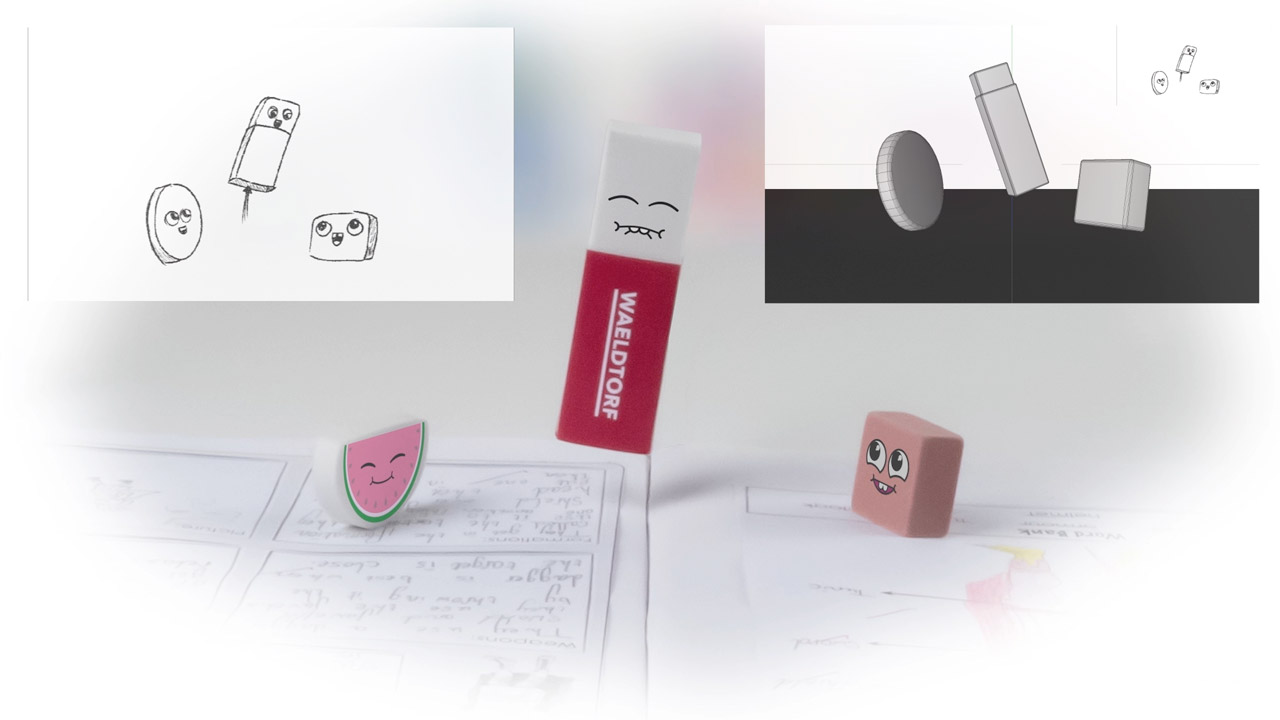
The first stage of production on any film we make, whether it’s animated or filmed, is normally the creation of a storyboard. On this, we lay out the different scenes of the film, like a rough comic-strip, allowing both us and the client to visualise how the film works as a narrative, and how different scenes fit together.
Once this has been agreed on, we next make an animatic, which, in its simplest form is just the storyboard frames timed out in a video. The animatic can help us spot a number of issues, which sometimes aren’t apparent at the storyboard stage – mostly to do with pace and timing, but also transitions and movement. Once this stage has been finalised, we would normally move on to the production of the finished piece.
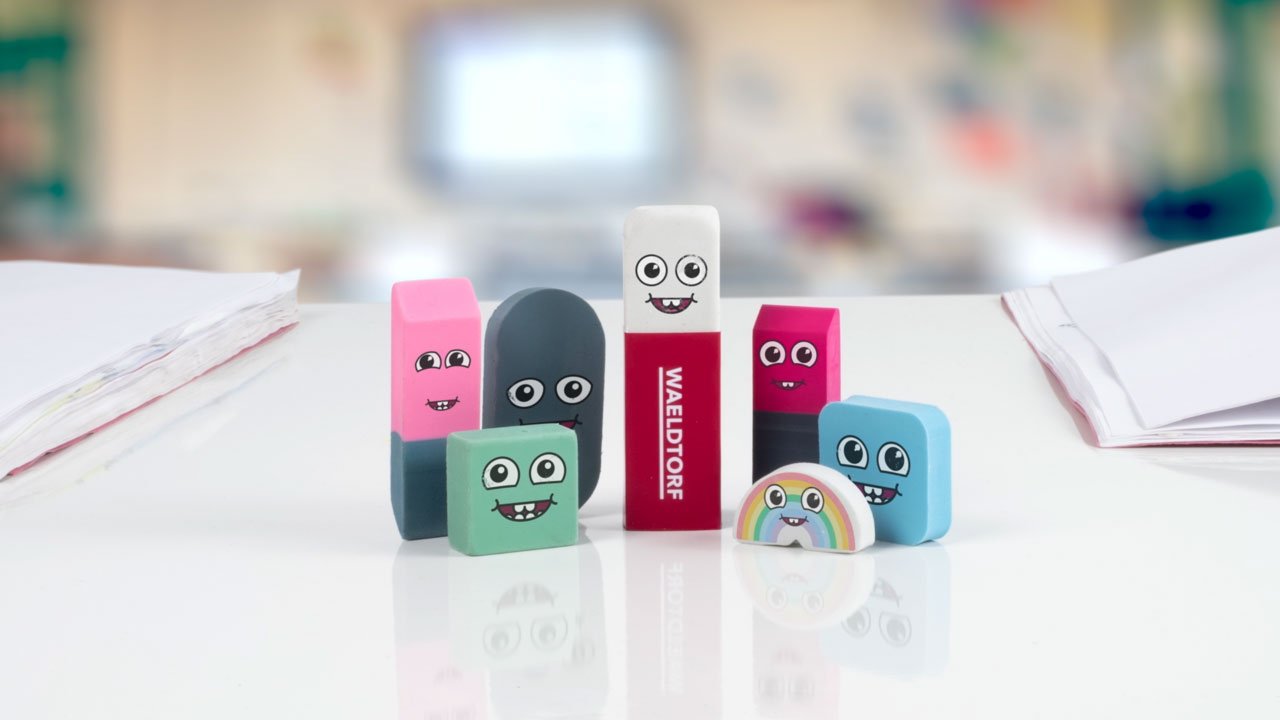
When working on a digital animation, there are normally a few tweaks here and there along the way, but with stop-motion animation (also known as stop frame) this luxury isn’t available to us. It can take a full day to shoot one short scene, and once it’s been shot, any edits will either require a reshoot, or a lot of technical jiggery-pokery. Either way, it’s going to cost time and money to fix any changes. We learnt a few of these techniques on the work we did for LEGO Education.
With this in mind, for the recent films we made for BBC Learning, we took the animatic a stage further, and created a more complete version of the film in our 3D animation software, Cinema 4D. By following this detailed animatic we knew we’d have all the shots we needed for the films.
For the stop frame shoot we use a piece of software called Dragonframe. It allows us to take a live feed from the camera and superimpose it over a guide layer (in this case, our animatic). Next up, several hours of (painstaking) nudging of the ‘characters’ (rubbers, pens, water bottles etc…) into their intended positions and taking the photograph.
Move, shoot, repeat until your film is finished*.
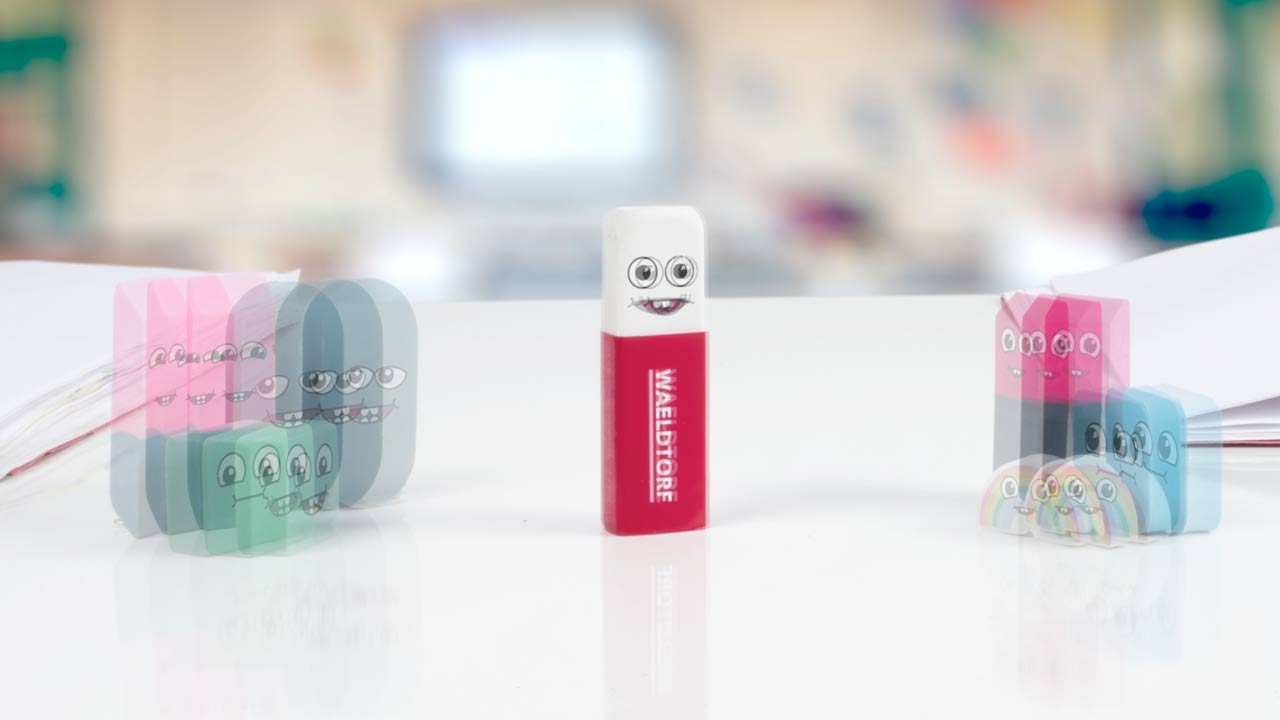
Whilst this was a sure-fire, idiot proof way to get the job done, there were a few scenes where we wanted to “freestyle”. For these scenes we only vaguely followed the animatic and employed another technique called ‘onionskinning’. This replicates the traditional method of drawing on translucent paper so you can see what animation has happened on the frames before (or after) your current one.
Dragonframe allows us to do this with the camera, meaning we can see the live feed over the last few frames already shot. We can also use it to show upcoming frames from the animatic. This is particularly useful when the characters needed to be in a specific position at a specific time. How they move between these positions is the fun part, but if they didn’t hit their marks on time, the whole animation would be thrown off.
These sections of ‘improv’ not only work to fulfil the needy animator’s desire to create “real animation” and make them feel like they’re a proper artist, they also give the films more life and character. It’s the imperfections that add to the charm of stop-motion, but if you’re not careful, too much ‘charm’ could creep in, and leave you with an unwatchable mess.
With a little help from our animatics and some clever software, we’re able to keep our charm levels firmly in check.