

Not having too much experience with Xpresso before, it’s been something I’ve wanted to learn more about and include it into my workflow. With a recent project that we have been working on here at Mighty Giant, I had the chance to try out adding Xpresso to the scene to help with efficiency. For this project I was wanting to have more control over turning off and on specific lights that would be needed for certain shots.
I initially headed to the internet to find tutorials and research any examples that related to what I was wanting to implement into my scene. I found there were limited numbers of resources to look at in regards to teaching Xpresso, especially a step by step guide of what I was after. That would be too easy. However, with some overall information and a bit of trial and error I was able to set up a system that worked.
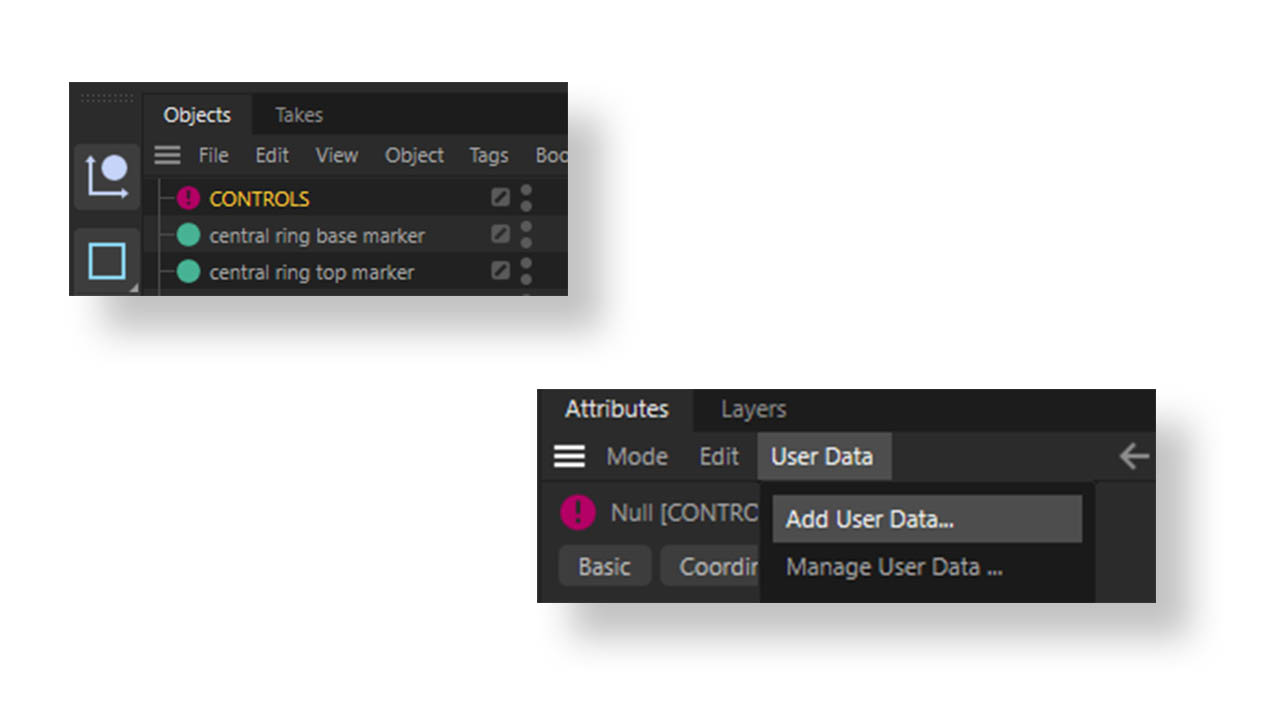
To begin with, I added a null that was going to be the location of the main controller. This would help avoid having to scroll down to turn on and off different lights. In this null I went down to the ‘User Data’ tab and added a new one which opened up the manager window.
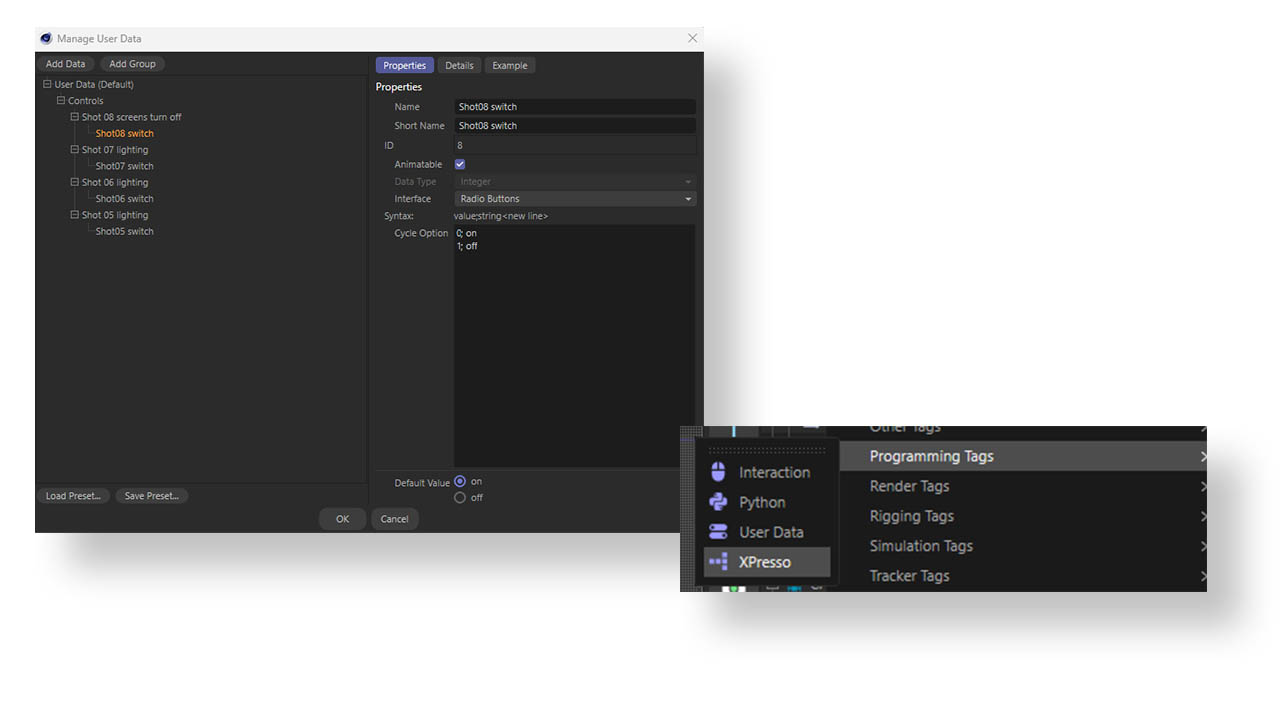
In the manager, I began to add my main control sections by clicking the ‘add Data’ button. The initial data was called Controls, so it created a housing for my switch options. Within this I added a sub data card as the title box of my light option, and another sub data card as the switch controller. In here I went into the properties and made the ‘Data type’ Integer and changed the interface to ‘Radio Buttons’, so I would be able to create a digital switch. To do this I put in a little bit of coding into the ‘Cycle Option’ (using my minimal coding knowledge) so it would create two switch options – on and off. I did this for all the switches that I needed, following the same method for each. I made sure to save this out before closing so all the switch options would appear in the ‘Control’ null.
Next I right clicked on the null and went down to the programming tags to add the Xpresso tag. Here is the more tricky part that was going to push my experience of the Xpresso interface. I took the idea of how to use it to be similar to the Redshift material editor, where it was about connecting different nodes together to create the right pathways.
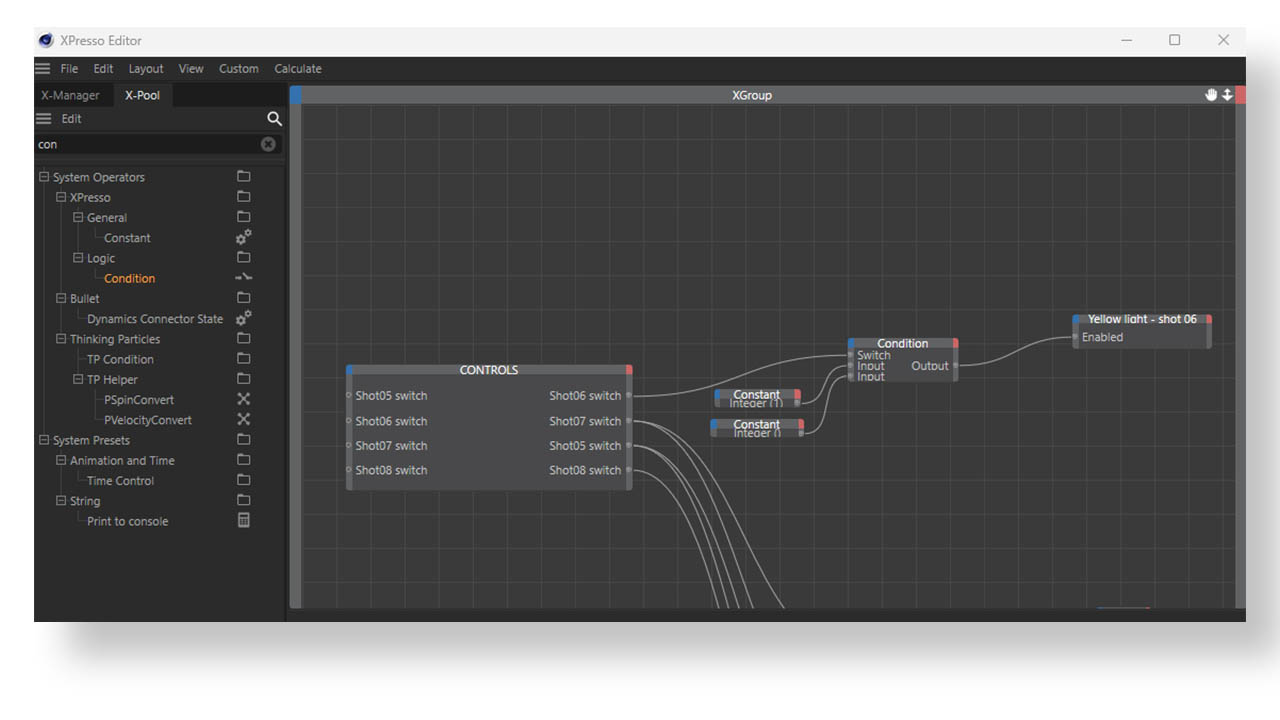
To start, I dragged the main control null into Xpresso so it would create a node box. Next, I right clicked on the red and blue corners of the node box, scrolled down to user data and brought up the different switches I had made earlier.
Using Xpresso’s tools I then added a condition node and a couple of constant nodes – one set to ‘1’ and the other set to ‘0’, to emulate the switch reader we had set up earlier in the user data manager. I connected one of the switches from the control node to the ‘switch’ in the condition box and then the constant nodes to the two inputs, making sure the constant with ‘1’ was first so it would read the on and off condition right.
After this I then dragged in the lights that I wanted this switch to control, and attached the condition output to the lights ‘Enabled’ toggle in the basic attribute tag. Sometimes if you can’t see it in the Xpresso, you can drag it from the light/object itself to the right node in Xpresso to create the output/input you need.
Once the pathway was created, I tested it all in the ‘Control’ null, seeing if the switches worked and actually enabled and disabled the correct lights through the system I had built – thankfully it did.
In all, this was a simpler way of having a main control point for turning lights on and off in my project scene. I was also able to start understanding Xpresso a bit more and the benefits you can get from using it. It doesn’t always work in every project as it’s not always necessary to use, but is a helpful tool to start understanding.
Hopefully this insight was helpful as this setup can also apply to controlling other objects not just lights, if enabling and disabling elements is what you are after.